How Long Does It Take to Alter a Mother of the Bride Dress?

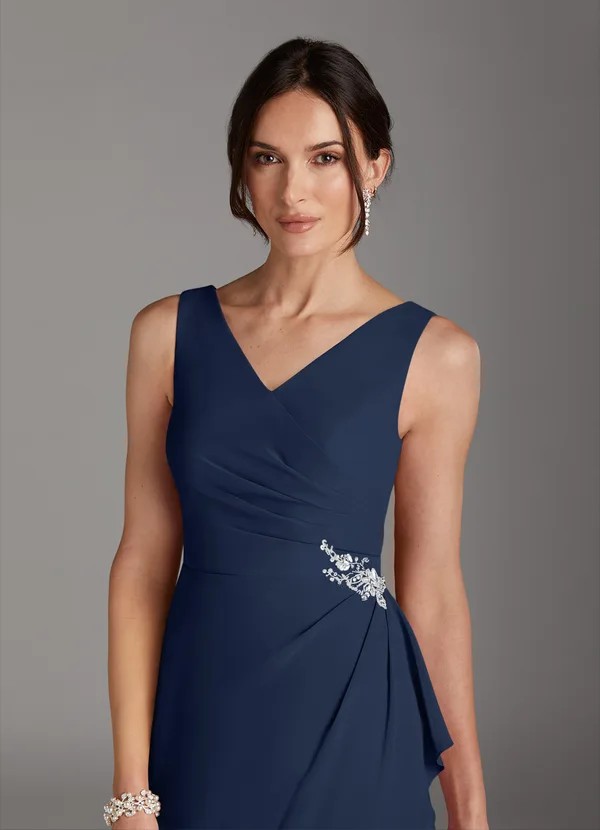
A beautifully tailored mother-of-the-bride (or groom) dress looks polished, feels comfortable, and photographs flawlessly. Even when the dress is a near-perfect pick from the rack, most moms still need some tailoring—hems, straps, shaping, or a bustle for a dramatic skirt.
So, how long do alterations take and how do you plan them without stress? Use this calm, step-by-step guide to map your timeline, understand what affects duration, and walk into each fitting knowing exactly what to ask.
Plan 4–8 weeks for standard mother-of-the-bride alterations with 2 fittings. If your dress has lace, beading, sleeves, or multiple layers, allow 6–10 weeks and expect 2–3 fittings.
Start early—ideally 8–12 weeks before the wedding—to protect a buffer. Lock shoes and undergarments before your first fitting, and run comfort tests (sit, stairs, hug, arms-up). Most tailoring is predictable when decisions are batched at Fitting #1 and the hem, sleeves, and shaping are refined at Fitting #2.
At-a-Glance Timelines
| Scenario | Total Alteration Window | Fittings | Typical Work Included |
| Simple & Sleek (sheath/column in crepe or stretch satin) | 4–6 weeks | 2 | Hem, strap/shoulder adjust, light waist/hip nip |
| Classic A-Line (unembellished or minimal trim) | 5–7 weeks | 2 | Hem with lining, bodice shaping, strap/sleeve tweak |
| Lace or Beading (bodice or sleeves) | 6–9 weeks | 2–3 | Motif matching, careful hem, sleeve length/fit |
| Chiffon/Georgette Layers | 6–8 weeks | 2–3 | Multi-layer hem, bodice nip, strap/sleeve adjust |
| Formal/Structured (mikado, jacquard, ball-gown or jacketed look) | 7–10 weeks | 2–3 | Hem + lining + underlay, jacket sleeve, waist/hip balance |
| Rush Path (tight dates) | 2–4+ weeks | 1–2 | Prioritize hem + critical fit; keep changes minimal |
What Drives the Timeline?

- Dress Complexity
- More layers, beading, or lace → more time for handwork and motif matching.
- Structured fabrics (mikado, jacquard) require precision pressing and balanced seams.
- Alteration Scope
- Basic: hem, straps, minor waist taper → faster.
- Advanced: sleeve reshaping, neckline changes, jacket tailoring, built-in support or modesty panels → longer.
- Fabric Behavior
- Crepe / stretch satin: friendly, faster.
- Chiffon / georgette / tulle: careful hemming across layers.
- Lace / sequins: handwork slows the clock.
- Season & Seamstress Capacity
- Spring and fall are busy—book earlier.
- Holiday or destination events can compress shop schedules.
- Body Changes & Undergarments
- If you plan to change weight or switch shapewear, expect one extra check.
- Lock shoes + undergarments before pinning; changing later = rework.
Month-by-Month Planner (wedding-date back-plan)
| Wedding Month | Book Alterations By | Fitting #1 Target | Fitting #2 Target | Final Pickup |
| Jan | Early Nov | Late Nov | Mid Dec | Early Jan |
| Feb | Late Nov | Early Jan | Late Jan | Early Feb |
| Mar | Dec | Late Jan | Mid Feb | Late Feb |
| Apr | Jan | Early Feb | Early–Mid Mar | Late Mar |
| May | Feb | Early Mar | Early Apr | Late Apr |
| Jun | Mar | Early–Mid Apr | Mid–Late May | Early Jun |
| Jul | Apr | Early May | Mid Jun | Late Jun |
| Aug | May | Early Jun | Mid Jul | Late Jul |
| Sep | Jun | Early Jul | Mid Aug | Late Aug |
| Oct | Jul | Early Aug | Early Sep | Late Sep |
| Nov | Aug | Early Sep | Mid Oct | Late Oct |
| Dec | Sep | Early Oct | Early Nov | Late Nov |
What Gets Altered (and how long each can take)
| Task | What It Fixes | Fabric Notes | Typical Time Window |
| Hem (dress + lining) | Sets length for shoes; prevents dirt & tripping | Crepe: quick; chiffon/tulle: layered; lace: handwork at edge | 1–3 weeks |
| Strap/Shoulder Adjust | Stops slipping or digging | Simple on sleeveless; jacket/illusion needs care | 1–2 weeks |
| Bodice Shaping (bust/waist) | Smooths fit; prevents gaping | Boning or heavy seaming adds time | 1–3 weeks |
| Hip/Seat Taper or Let-Out | Refines silhouette; improves sitting | Check seam allowance first | 1–2 weeks |
| Sleeve Length/Width | Comfort & mobility | Beaded lace → handwork; jacket sleeves involve vents/buttons | 2–4 weeks |
| Neckline Tweaks | Modesty, comfort, or balance | Minimal changes are faster | 2–4 weeks |
| Jacket/Bolero Fit | Shoulder and sleeve comfort | Structured fabrics take longer | 2–4 weeks |
| Bustle (for longer hems/trains) | Lifts hem for reception | Light chiffon easy; heavy fabrics = multiple points | 1 week |
Fitting-by-Fitting: What Happens & When
Fitting #1 (Plan & Pin) — 30–60 minutes
Book 8–10 weeks before the wedding (earlier in peak season).
Bring:
- Final shoes and undergarments/shapewear.
- Jewelry or topper (jacket/bolero/shawl) you’ll wear.
What to decide:
- Hem length (“kisses the floor,” not puddling).
- Strap/shoulder position and sleeve comfort.
- Bodice/waist/hip shaping.
- Whether you need a bustle (for long hems or trains).
Movement tests to run:
- Breath (full inhale).
- Sit (on a chair; ankles crossed).
- Stairs (3 steps up and down).
- Hug (arms around someone).
- Arms-up (reach overhead).
Fitting #2 (Refine & Confirm) — 20–45 minutes
Book 4–6 weeks before the wedding.
Bring:
- Same shoes and undergarments.
- Veil or headpiece, and your evening shawl/bolero if using one.
What happens:
- Hem and shaping are refined.
- Sleeve/shoulder ease is checked; add hidden elastic or a micro-gusset if needed.
- Bustle rehearsal (time it; your helper films).
- Photo check: front, side, and back in warm light.
Green lights to look for:
- No gaping or biting at neckline/armhole.
- Zipper lies flat—no ripples.
- You can breathe, sit, hug, stairs, arms-up, and spin without adjusting anything.
Final Fitting & Pickup — 15–30 minutes
Book 1–2 weeks before the wedding.
What to do:
- Quick comfort run-through and bustle practice.
- Get steam and storage instructions.
- Take your dress in a breathable garment bag; lay a clean sheet under the hem at home.
Comfort First: How to Know It’s Right
- Anchored, not tight.
The bodice feels secure without squeezing; shoulders relax naturally. - Sleeves that move.
You can toast, greet, and dance without a pinch. - Hem that “kisses” the floor.
No constant toe peeking or tripping—especially on stairs and lawn. - Bustle you can manage.
Your helper can do it in under 2 minutes with labeled points.
Undergarments & Shoes: Lock These Early
Why it matters: changing undergarments or heel height after Fitting #1 reopens the hem and bodice math.
- Undergarments:
- Longline or structured bra for boatneck/off-shoulder or when you want smooth waist anchoring.
- Bonded-edge brief or thong to avoid lines under crepe or satin.
- Light smoothing shorts if needed—choose breathable, not rigid.
- Shoes:
- Pick the heel height you’ll wear all day.
- Add nonslip pads for marble/ballroom floors; heel protectors for lawn.
Fabric Behavior Tips (so you plan realistic time)
| Fabric | Time/Complexity Signal | Planning Note |
| Stretch Crepe | Friendly, quick to tailor | Great for comfort; watch for lines → choose smooth underlayers |
| Chiffon/Georgette | Multi-layer hem time; careful handling | Schedule an extra week for layered skirts |
| Lace | Motif matching adds handwork time | Bring close-ups of any motifs you want preserved |
| Satin/Mikado | Precise pressing & seam balance | Steam from inside; ripples = tension to correct |
| Jacquard | Structured; resists quick tweaks | Expect a more deliberate fitting pace |
Short on Time? Prioritize These
When you have 2–4 weeks max, focus on the changes with the biggest visual and comfort impact:
- Hem (front kiss length)
- Bodice security (cups/longline; side seam nip/let-out)
- Strap/sleeve comfort (shorten; add hidden elastic)
- Bustle (for long hems or outdoor movement)
Save decorative neckline changes or deep motif work for when there’s a fuller window.
Fitting Questions to Bring (and why)
- “Can we mark the hem for my actual surface—lawn, sand, marble?”
Prevents dirt pickup and tripping. - “Do I need a bustle for portraits or just reception?”
Keeps edges clean outdoors and light for dancing. - “Where will you add or remove ease if my breathing feels tight?”
Confirms seam allowance and comfort plan. - “Can we add hidden elastic or a micro-gusset in the sleeve?”
Restores reach without changing the look. - “What’s the safest steaming method for this fabric?”
Avoids shine on satin/mikado and water rings on crepe.
Day-Of Comfort & Cleanliness Mini-Plan

- Dress after makeup; veil last.
Use a clean cloth at the neckline when stepping in. - Carry a small kit (with your helper):
- Fashion tape, nipple covers, safety pins, mini sewing kit.
- Microfiber cloth, blot papers, anti-chafe balm.
- Lint roller; heel pads; nonslip stickers; heel protectors.
- Bustle early for outdoor photos to protect the hem.
- Sit on a clean cloth and hold bouquets low to avoid touching the bodice.
Special Scenarios (and timing tweaks)
- Sleeved or Jacketed Looks
- Expect one extra check for sleeve width and jacket ease.
- Allow 6–9 weeks; sleeves often need precision for comfort.
- Modesty Adjustments (neckline fill, illusion panels)
- Add 2–3 weeks for fabric sourcing and careful placement.
- Weight Fluctuation or Post-surgery
- Schedule final fitting 1–2 weeks before the event; keep undergarments consistent.
- Destination Weddings
- Finish 3 weeks early; plan travel steaming and bring written care notes.
Common Issues & Fix Paths
- Straps slipping: shorten or move in 0.5–1 cm; add discreet grippers.
- Neckline gaping: micro-dart or sewn-in cups; light side-seam nip.
- Underarm bite: add hidden elastic or a micro-gusset.
- Zipper ripple (on satin): tension—ask about letting out or redistributing seams.
- Mermaid stride too tight: raise flare point or add a discreet slit/godet.
- Hem catching on grass: shorten to a true kiss; engage bustle outdoors.
Mother-Daughter Coordination Tips (to save time)
- Align event formality and color family early.
If the bridal palette is champagne, cabernet, dark navy, or eucalyptus, choose your shade now to avoid last-minute swaps. - Share your shoe height and sleeve plan with the bride’s team.
Ensures bouquet height, boutonniere pinning, and photo framing suit your neckline and sleeves. - Set a shared fitting week if possible.
Back-to-back fittings (bride + mom) streamline decisions on veil length, photo composition, and ceremony spacing.
Frequently Asked Questions
Can alterations be done in under a month?
Often yes—prioritize hem, bodice security, and sleeves.
Keep changes focused, and be ready to attend fittings promptly.
Do I need shapewear for fittings?
Only if you plan to wear it on the day.
Bring the exact pieces to every fitting; changing later alters the fit.
How many fittings are typical?
Two for simple tailoring; three if sleeves, lace, or complex fabrics are involved.
A brief final check is still wise 1–2 weeks before the event.
What if I lose or gain weight close to the wedding?
Tell your tailor immediately.
Many dresses have a small seam allowance for let-out; schedule a quick check in the final 10–14 days.
Do I need a bustle for a mother-of-the-bride dress?
Only if your hem or overskirt is long enough to catch on steps or floors.
A simple bustle protects the fabric and makes dancing easier.
Are jacket sleeves hard to alter?
They take care, especially with vents or embellishments.
Plan an extra week and bring the jewelry you’ll wear to test movement.
What’s the number-one time saver?
Lock shoes and undergarments before Fitting #1.
It keeps the hem and bodice measurements stable.
Final Takeaway
For most mother-of-the-bride (or groom) dresses, expect 4–8 weeks and 2 fittings; complex fabrics or sleeves may need 6–10 weeks and 2–3 fittings. Book your first appointment 8–12 weeks before the wedding, bring final shoes and undergarments, and run the comfort tests at every visit.
Prioritize hem, bodice security, sleeve comfort, and a clear bustle plan. Finish 2–3 weeks early so the last days are about joy, not logistics. With a thoughtful timeline and a few smart choices, your dress will look elegant and feel effortless from morning photos to the last dance.